总是喜欢去关注更多的新框架,发现了一个基本上不用写mapper和xml的框架。让我们来研究一下这个框架吧。
1. 新建Spring Boot项目
1.1 pom .xml配置
 <properties>
	< java .version>1.8</java.version>
	<fluent-mybatis.version>1.6.13</fluent-mybatis.version>
</properties>
<dependencies>
	<dependency>
		<groupId>org.springframework.boot</groupId>
		<artifactId>spring-boot-starter-web</artifactId>
	</dependency>

	<dependency>
		<groupId>mysql</groupId>
		<artifactId> mysql -connector-java</artifactId>
		<scope>runtime</scope>
	</dependency>

	<dependency>
		<groupId>org.projectlombok</groupId>
		<artifactId>lombok</artifactId>
		<optional>true</optional>
	</dependency>

	<dependency>
		<groupId>org.springframework.boot</groupId>
		<artifactId>spring-boot-starter-test</artifactId>
		<scope>test</scope>
	</dependency>

	<!-- 引入fluent-mybatis 运行依赖包, scope为compile -->
	<dependency>
		<groupId>com.github.atool</groupId>
		<artifactId>fluent-mybatis</artifactId>
		<version>${fluent-mybatis.version}</version>
	</dependency>
	<!-- 引入fluent-mybatis-processor, scope设置为provider 编译需要,运行时不需要 -->
	<dependency>
		<groupId>com.github.atool</groupId>
		<artifactId>fluent-mybatis-processor</artifactId>
		<version>${fluent-mybatis.version}</version>
	</dependency>

	<dependency>
		<groupId>org.mybatis.spring.boot</groupId>
		<artifactId>mybatis-spring-boot-starter</artifactId>
		<version>2.2.0</version>
	</dependency>
</dependencies>
我们这里引入了fluent-mybatis-processor就是想自动生成代码,尽量减少我们自己写代码。
1.2 application.yml配置
 server:
  port: 8080 # 端口号
spring:
  datasource: # 数据库参数配置
    driver-class-name: com.mysql.cj.jdbc.Driver
    url: jdbc:mysql://IP:3306/数据库名称?useUnicode=true&characterEncoding=utf8
    username: 用户名
    password: 密码
1.3 EntityGeneratorTests.java 自动代码生成
这个我尝试过在非Test里面用main里面运行,结果总是失败,有可以运行的请告诉我哈!
 @SpringBootTest
public class EntityGeneratorTests {

    // 数据源 url
    static final String url = " jdbc :mysql://IP:3306/数据库名称?useUnicode=true&characterEncoding=utf8";
    // 数据库用户名
    static final String username = "用户名";
    // 数据库密码
    static final String password = "密码";

    @Test
    public void generate() {
        // 引用配置类, build方法 允许有多个配置类
        FileGenerator.build(Empty.class);
    }

    @Tables(
            // 设置数据库连接信息
            url = url, username = username, password = password,
            // 设置entity类生成src目录, 相对于 user.dir
            srcDir = "src/main/java",
            // 设置entity类的package值
            basePack = "xyz.zhouzhaodong.fluentmybatis",
            // 设置 dao 接口和实现的src目录, 相对于 user.dir
            daoDir = "src/main/java",
            // 设置哪些表要生成Entity文件
            tables = {@Table(value = {"user"})}
    )
    static class Empty { //类名随便取, 只是配置定义的一个载体
    }

}
运行后生成如下三个文件:

1.4 生成代码后编译会在target目录生成代码

运行后生成的代码如下:
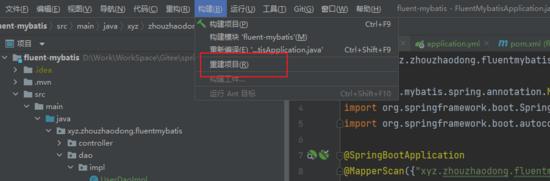
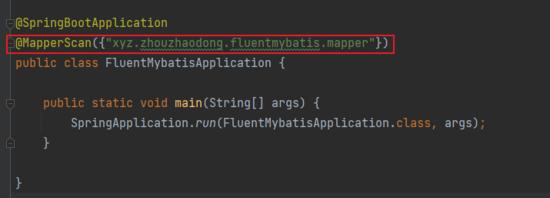
1.5 启动类配置 @MapperScan
@MapperScan地址为上面target目录下的mapper
可参考我的:
1.6.1 getByIdOne
可以参考官方文档进行研究,我这里只是简单的进行逻辑的实现。
文档地址为:
 @ Rest Controller
@RequestMapping("/user")
public class UserController {

    @Resource
    UserDao userDao;

    @Resource
    UserMapper userMapper;

    /**
     * 根据ID查询数据1
     * @param id
     * @return
     */
    @GetMapping("/getByIdOne")
    public UserEntity getByIdOne(Integer id){
        return userDao.selectById(id);
    }

    /**
     * 根据ID查询数据2
     * @param id
     * @return
     */
    @GetMapping("/getByIdTwo")
    public UserEntity getByIdTwo(Integer id){
        UserQuery query = new UserQuery().where.id().eq(id).end();
        return userMapper.findOne(query);
    }

    /**
     * 根据ID删除
     * @param id
     */
    @GetMapping("/deleteById")
    public void deleteById(Integer id){
        userDao.deleteById(id);
    }

    /**
     * 根据ID进行更新
     * @param userEntity
     * @return
     */
    @PostMapping("/updateById")
    public UserEntity updateById(@RequestBody UserEntity userEntity){
        boolean b = userDao.updateById(userEntity);
        if (b){
            return userDao.selectById(userEntity.getId());
        }
        return null;
    }

    /**
     * 新增
     * @param userEntity
     * @return
     */
    @PostMapping("/insert")
    public Integer insert(@RequestBody UserEntity userEntity){
        return userDao.save(userEntity);
    }
}
接下来进行测试:
1.6.1 getByIdOne

1.6.2 getByTwo

1.6.3 deleteById

1.6.4 insert

1.6.5 updateById
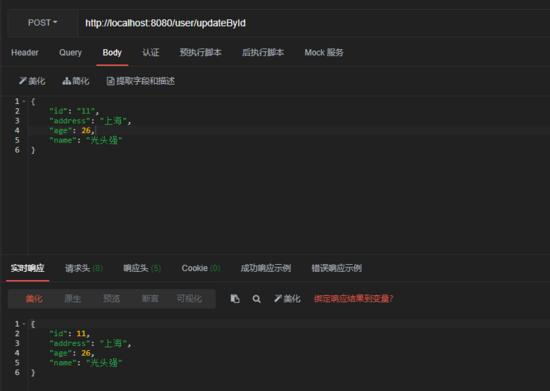
简单测试通过!
源代码地址:
如果您觉得文章对您有帮助,可以点赞评论转发支持一下~蟹蟹!


