对于程序中一些字典信息、配置信息应该在程序启动时加载到 缓存 中,用时先到缓存中取,如果没有命中,再到数据库中获取同时放到缓存中,这样做可以减轻数据库层的压力。目前暂时先整合ehcache缓存,同时预留了集成redis和memcached的接口。
先开发两个最基本的功能,就是注册和登录,对于页面几乎就是直接用bootstrap的风格,目前没有过多的设计。
1、整合ehcache
在spring boot中整合ehcache还是很方便的,首先添加依赖:
<dependency>
 <groupId>org.springframework.boot</groupId>
 <artifactId>spring-boot-starter-cache</artifactId>
</dependency>
<dependency>
 <groupId>net.sf.ehcache</groupId>
 <artifactId>ehcache</artifactId>
 <version>2.10.2</version>
</dependency>
新增ehcache的配置文件,ehcache.xml,即:
<?xml version="1.0" encoding="UTF-8"?>
<ehcache xmlns:xsi=""
 xsi:noNamespaceSchemaLocation="ehcache.xsd"
 updateCheck=" false "
 monitoring="autodetect"
 dynamicConfig="true">
<diskStore path="java.io.tmpdir" />
<!-- 系统临时缓存(十分钟) -->
<cache
 name="SystemTempCache"
 maxEntriesLocalHeap="0"
 maxEntriesLocalDisk="10000000"
 eternal="false"
 timeToIdleSeconds="0"
 timeToLiveSeconds="600"
 overflowToDisk="false"
 diskPersistent="false"
 diskExpiryThreadIntervalSeconds="120"
 diskSpoolBufferSizeMB="30"
 memoryStoreEvictionPolicy=" LRU ">
</cache>
<!-- 系统永久缓存 -->
<cache
 name="SystemEternalCache"
 maxEntriesLocalHeap="0"
 maxEntriesLocalDisk="10000000"
 eternal="true"
 overflowToDisk="false"
 diskPersistent="false"
 diskExpiryThreadIntervalSeconds="120"
 diskSpoolBufferSizeMB="30"
 memoryStoreEvictionPolicy="LRU">
</cache>
</ehcache>
其中设置了两种缓存类型,一个是临时缓存,另一个是永久缓存。
此处使用缓存方式不是基于注解的,虽然基于注解的方式也很方便,但是个人觉得还是自己程序控制缓存好一些。
程序中会将站点的配置信息加载到缓存中,那么使用方式如下:
(1)、首先定义一个缓存接口,本程序中需要用到缓存的,必须实现该接口,即:
package com.swnote.common.cache;
/**
 * 缓存接口
 *
 * @author lzj
 * @since 1.0
 * @date [2019-04-27]
 */public interface ICache<T> {
 /**
 * 根据key获取缓存数据
 *
 * @param key
 * @return
 */ public T get(Object key);
 /**
 * 存放缓存数据
 *
 * @param key
 * @param value
 */ public void put(Object key, T value);
 /**
 * 根据key移除内容
 *
 * @param key
 */ public void remove(Object key);
}
(2)、站点配置信息缓存ConfigCache,实现该接口,即:
package com.swnote.common.cache;
import com.swnote.common.domain.Config;
import com.swnote.common.service.I config Service;
import com.swnote.common.util.Const;
import lombok.extern.slf4j.Slf4j;
import org.springframework.beans.factory.annotation.Autowired;
import org.springframework.cache.Cache;
import org.springframework.cache.CacheManager;
import org.springframework.context.annotation.DependsOn;
import org.springframework.stereotype.Component;
import javax.annotation.PostConstruct;
import java.util.List;
/**
 * 缓存配置信息
 * 配置信息放到系统永久缓存中,存放形式为:"_CONFIG" + configId为key,value为配置信息对象
 *
 * @author lzj
 * @since 1.0
 * @date [2019-04-27]
 */@Slf4j
@DependsOn("configService")
@Component("configCache")
public class ConfigCache implements ICache<Config> {
 /**
 * 注入基于Spring提供的Cache接口实例,默认由Ehcache实现
 * TODO 以后也可以是Redis、Memcached提供实现
 */ @Autowired
 private CacheManager cacheManager;
 @Autowired
 private IConfigService configService;
 /**
 * 系统临时缓存实例
 */ private Cache cache;
 /**
 * key的前缀
 */ private String keyPrefix = "_CONFIG";
 @PostConstruct
 public void init() {
 // 获取系统永久缓存实例
 cache = cacheManager.getCache(Const.CACHE_SYSTEM_ETERNAL);
 log.info("获取系统永久缓存实例");
 log.info("开始加载所有配置信息");
 List<Config> configs = configService.list();
 if (configs != null && !configs.isEmpty()) {
 configs.stream().forEach(config -> cache.put(keyPrefix + config.getConfigId(), config));
 }
 log.info("加载完毕所有配置信息");
 }
 @Override
 public Config get(Object key) {
 Cache.ValueWrapper valueWrapper = cache.get(keyPrefix + key);
 if (valueWrapper == null) {
 // 此时从数据库重新加载一次
 Config config = configService.getById((String) key);
 if (config == null) {
 return null;
 }
 // 再次放到缓存中
 cache.put(keyPrefix + config.getConfigId(), config);
 return config;
 }
 return (Config) valueWrapper.get();
 }
 @Override
 public void put(Object key, Config value) {
 cache.put(keyPrefix + key, value);
 }
 @Override
 public void remove(Object key) {
 cache.evict(keyPrefix + key);
 }
}
2、注册功能
注册页面效果如下:
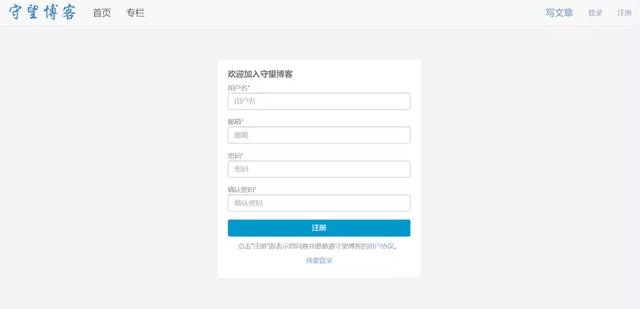
页面风格很素,这个暂时先这样。
主要看一下UserController中处理注册信息的关键代码,即:
/**
 * 保存注册信息
 *
 * @param model
 * @param  request
 * @return
 */@RequestMapping(value = "/auth/signup", method = RequestMethod.POST)
@ResponseBody
public Result signup(Model model, HttpServletRequest request) {
 Result result = new Result();
 try {
 // 接收参数
 String name = request.getParameter("name");
 String email = request.getParameter("email");
 String password = request.getParameter("password");
 // 简单校验
 if (StringUtils.isEmpty(name) || StringUtils.isEmpty(email) || StringUtils.isEmpty(password)) {
 throw new TipException("缺少必要请求参数");
 }
 if (!StringUtil.isEmail(email)) {
 throw new TipException("邮箱不符全规范");
 }

 // 校验用户名
 User tempUser = userService.getByName(name);
 if (tempUser != null && !StringUtils.isEmpty(tempUser.getUserId())) {
 throw new TipException("该用户已经注册了");
 }

 // 校验邮箱
 tempUser = userService.getByEmail(email);
 if (tempUser != null && !StringUtils.isEmpty(tempUser.getUserId())) {
 throw new TipException("该邮箱已经注册了");
 }
 // 获取用户ip
 String ip = HttpUtil.getIpAddr(request);
 // 构建用户信息
 User user = new User();
 user.setLoginName(name);
 user.setEmail(email);
 user.setPassword(StringUtil.md5(password));
 user.setCreateIp(ip);

 // 保存用户信息
 boolean flag = userService.create(user);
 if (!flag) {
 throw new TipException("用户创建失败");
 }
 result.setCode(Result.CODE_SUCCESS);
 result.setMsg("用户创建成功");
 } catch (Exception e) {
 log.error("用户创建失败", e);
 result.setCode(Result.CODE_EXCEPTION);
 result.setMsg("用户创建失败");
 }
 return result;
}
在UserService中有一个create方法,即:
@Override
public boolean create(User user) {
 // 获取当前时间
 Date now = new Date();
 // 设置主键
 user.setUserId(IdGenarator.guid());
 // 设置未实名认证
 user.setRealStatus(User.REAL_STATUS_NO);
 // 用户是否需要激活
 Config config = configCache.get(Const.CONFIG_USER_ACTIVE);
 if (config != null && "1".equals(config.getConfigValue())) {
 // TODO 发送激活邮件信息
 // 说明需要激活
 user.setIsActive(User.ACTIVE_NO);
 } else {
 // 说明不需要激活,默认激活
 user.setIsActive(User.ACTIVE_YES);
 }
 // 设置启用账号状态
 user.setStatus(User.STATUS_YES);
 // 设置创建时间
 user.setCreateTime(now);
 // 设置关注数为0
 user.setFollows(0);
 // 设置粉丝数为0
 user.setFans(0);
 return save(user);
}
此处有一个还没有实现的功能,就是发送激活邮件信息,这个功能后面会补上,这里先处于TODO状态。
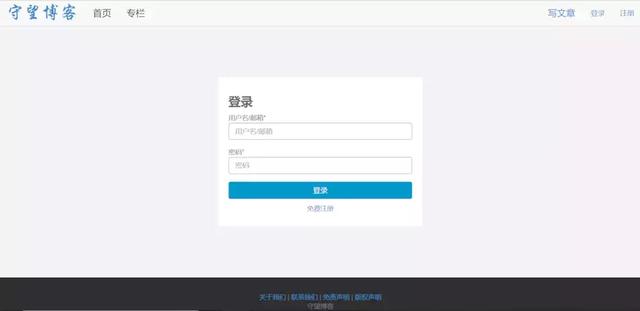
3、登录功能
登录页面效果如下:
UserController中关键的代码如下:
/**
 * 处理登录信息
 *
 * @param request
 * @return
 */@RequestMapping(value = "/auth/login", method = RequestMethod.POST)
@ResponseBody
public Result login(HttpServletRequest request, HttpSession session) {
 Result result = new Result();
 try {
 // 接收参数
 String name = request.getParameter("name");
 String password = request.getParameter("password");
 if (StringUtils.isEmpty(name) || StringUtils.isEmpty(password)) {
 throw new TipException("缺少必要请求参数");
 }
 // 获取用户ip
 String ip = HttpUtil.getIpAddr(request);
 User user = userService.verifyUser(name, password, ip);
 if (user == null) {
 throw new TipException("用户名或密码错误");
 }
 // 放置session信息
 session.setAttribute(Const.SESSION_USER, user);
 // TODO 还有一些相关统计信息,后面再加上
 result.setCode(Result.CODE_SUCCESS);
 result.setMsg("登录成功");
 } catch (TipException e) {
 result.setCode(Result.CODE_EXCEPTION);
 result.setMsg(e.getMessage());
 } catch (Exception e) {
 log.error("登录失败", e);
 result.setCode(Result.CODE_EXCEPTION);
 result.setMsg("登录失败");
 }
 return result;
}
当用户登录时,还有一些相关统计信息,这里由于其它功能还没有开发完,所以获取统计信息的代码后面再加上。


