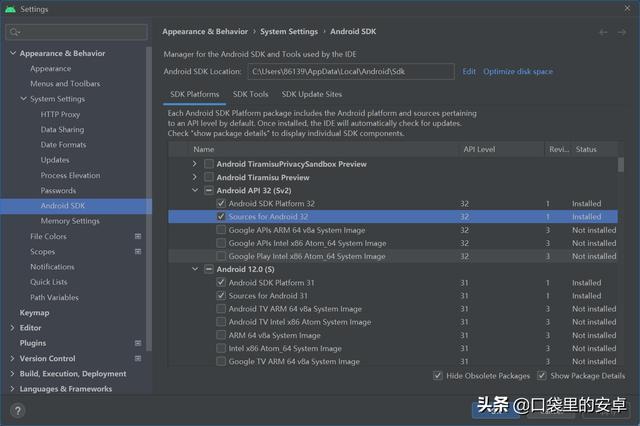
凡是学过 Java 的同学都知道程序的入口是一个静态的main函数。那么Android的main函数在哪里呢?好吧!我们来找一下吧,这里以API 32为准,找之前先在SDK Platforms里把Sources for Android 32下载并安装,如下图:
然后新建一个空白项目,然后顺着MainActivity的父类一路找下去
class MainActivity : AppCompatActivity()
public class AppCompatActivity extends FragmentActivity
public class FragmentActivity extends ComponentActivity
public class ComponentActivity extends androidx.core.app.ComponentActivity
public class ComponentActivity extends Activity 当进入 Activity .java后就打住,然后在这个文件里搜索ActivityThread,可以搜到如下的一段代码:
 @VisibleForTesting
public final ActivityThread getActivityThread() {
    return mMainThread;
}
通过变量名就知道这个方法会返回一个类型为ActivityThread的主线程,然后我们继续点进ActivityThread.java文件,我们要找的main函数就在这里。
 public  static   void  main(String[] args) {
    Trace.traceBegin(Trace.TRACE_TAG_ACTIVITY_MANAGER, "ActivityThreadMain"
    // Install selective syscall interception
    AndroidOs.install();
    //  Close Guard defaults to true and can be quite spammy.  We
    // disable it here, but selectively enable it later (via
    // StrictMode) on debug builds, but using DropBox, not logs.
    CloseGuard.setEnabled(false);
    Environment.initForCurrentUser();
    // Make sure Trusted Certificate Store looks in the right place for CA ce
    final  File  configDir = Environment.getUserConfigDirectory(UserHandle.my
    TrustedCertificateStore.setDefaultUserDirectory(configDir);
    // Call per-process mainline module  initialization .
    initializeMainlineModules();
    Process.setArgV0("<pre-initialized>");
    Looper.prepareMainLooper();
    // Find the value for {@link #PROC_START_SEQ_IDENT} if provided on the
    // It will be in the format "seq=114"
    long startSeq = 0;
    if (args != null) {
        for (int i = args.length - 1; i >= 0; --i) {
            if (args[i] != null && args[i].startsWith(PROC_START_SEQ_IDENT)
                startSeq = Long.parseLong(
                        args[i].substring(PROC_START_SEQ_IDENT.length()));
            }
        }
    }
    ActivityThread thread = new ActivityThread();
    thread.attach(false, startSeq);
    if (sMainThreadHandler == null) {
        sMainThreadHandler = thread.getHandler();
    }
    if (false) {
        Looper.myLooper().setMessageLogging(new
                LogPrinter(Log.DEBUG, "ActivityThread"));
    }
    // End of event ActivityThreadMain.
    Trace.traceEnd(Trace.TRACE_TAG_ACTIVITY_MANAGER);
    Looper.loop();
    throw new Runtime Exception ("Main thread loop unexpectedly exited");
}
按常识来说在main函数中的代码运行完后就意味着程序结束了,但是对于人机交互的图形化程序来说必然会有一个无限循环让程序一直处于运行状态,直到用户人为操作结束。而这个无限循环就在main函数内,那会是哪句呢?
其实这涉及到了在主线程实例化 Handler 的步骤了,所以我们也顺便看一下相关的代码:
 Looper.prepareMainLooper();
...
if (sMainThreadHandler == null) {
sMainThreadHandler = thread.getHandler();
}
...
Looper.loop();
Looper.prepareMainLooper()的作用是为当前线程实例Looper对象,这个对象是用来处理消息循环的。然后通过thread.getHandler获取一个Handler对象,用于收发和处理消息。最后通过Looper.loop启动消息循环,进入loop方法就可以看到那个使程序一直运行的无限循环了;
 public static void loop() {
    final Looper me = myLooper();
    if (me == null) {
        throw new RuntimeException("No Looper; Looper.prepare() wasn't called on
    }
    if (me.mInLoop) {
        Slog.w(TAG, "Loop again would have the queued messages be executed"
                + " before this one completed.");
    }
    me.mInLoop = true;
    // Make sure the identity of this thread is that of the local process,
    // and keep track of what that identity token actually is.
    Binder.clearCallingIdentity();
    final long ident = Binder.clearCallingIdentity();
    // Allow overriding a threshold with a system prop. e.g.
    // adb shell 'setprop log.looper.1000.main.slow 1 && stop && start'
    final int thresholdOverride =
            SystemProperties.getInt("log.looper."
                    + Process.myUid() + "."
                    + Thread.currentThread().getName()
                    + ".slow", 0);
    me.mSlowDeliveryDetected = false;
    for (;;) {
         if  (!loopOnce(me, ident, thresholdOverride)) {
            return;
        }
    }
}
注意看代码最后的那个for(;;)循环,要没这个循环的话程序也就结束了。
通过阅读代码我们得出一个结论,main函数运行在哪个 线程 上,哪个线程就是主线程。而Handler的实例步骤无论是主线程和子线程都是一样的,只是主线程在一开始的地方就已经为我们实例好了Looper对象,而子线程没有,所以必须要手动的调用Looper.prepare()和Looper.loop()。


