1、基本概念
SSO (Single Sign On)
SSO英文全称Single Sign On,单点登录。SSO是在多个应用系统中,用户只需要登录一次就可以访问所有相互信任的应用系统。它包括可以将这次主要的登录映射到其他应用中用于同一个用户的登录的机制。它是目前比较流行的企业业务整合的解决方案之一。
spring security
Spring Security 是一个安全框架
Spring Security 提供了若干个可扩展的、可声明式使用的过滤器处理拦截的web请求。
在web请求处理时, Spring Security框架根据请求url和声明式配置,筛选出合适的一组过滤器集合拦截处理当前的web请求。
这些请求会被转给Spring Security的安全访问控制框架处理通过之后,请求再转发应用程序处理,从而增强了应用的安全性。
Spring Security 提供了可扩展的认证、鉴权机制对Web请求进行相应对处理。
- 认证:识别并构建用户对象,如:根据请求中的 username ,获取登录用户的详细信息,判断用户状态,缓存用户对象到请求上下文等。
- 决策:判断用户能否访问当前请求,如:识别请求url,根据用户、权限和资源(url)的对应关系,判断用户能否访问当前请求url。
2、认识完了spring security现在就开始撸代码了
首先我们建一个父工程、三个子工程
sso-demo(父工程)
sso-server(认证服务器)
sso-client1(客户端1)
sso-client2(客户端2)
sso-server的pom.xml 中添加依赖
<dependency>
<groupId>org.springframework.boot</groupId>
<artifactId>spring-boot-starter-security</artifactId>
</dependency>
<dependency>
<groupId>org.springframework.boot</groupId>
<artifactId>spring-boot-starter-web</artifactId>
</dependency>
<dependency>
<groupId>org.springframework.security.oauth</groupId>
<artifactId>spring-security-oauth2</artifactId>
</dependency>
<dependency>
<groupId>org.springframework.security</groupId>
<artifactId>spring-security-jwt</artifactId>
</dependency>
<dependency>
<groupId> mysql </groupId>
<artifactId>mysql-connector-java</artifactId>
</dependency>
<dependency>
<groupId>org.springframework.boot</groupId>
<artifactId>spring-boot-starter-jdbc</artifactId>
</dependency>
<dependency>
<groupId>org.springframework.boot</groupId>
<artifactId>spring-boot-starter-thymeleaf</artifactId>
</dependency>
配置下服务器的端口号
server .port = 9999
server.context-path = /server
(一)、新建 SecurityConfig 类并继承 WebSecurityConfigurerAdapter 添加注解 @Configuration
重写方法
/**
* 设置表单登录等选项 –自定义页面等
* @param http
* @throws Exception
*/
@ Override
protected void configure(HttpSecurity http) throws Exception {
http.formLogin() //设置表单登录
.loginPage( “/login” )//设置登录跳转页面controller、也可以直接跳转页面
.loginProcessingUrl( “/authentication/form” ) //自定义登录页面的表单提交地址
.and()
.authorizeRequests()
.antMatchers( “/login” , “/register” , “*/css/**” , “/code/image” , “/logout” , “/code/sms” ).permitAll()//过滤不需要拦截认证的资源
.anyRequest()
.authenticated()
.and()
.csrf(). disable ();
http.logout().permitAll()
.logoutUrl( “/logout” )//注销
.logoutSuccessUrl( “/login” );//注销成功后跳转的页面
}
/**
* 声明加密的Bean
* @ return
*/
@Bean
public PasswordEncoder passwordEncoder () {
return new BCryptPasswordEncoder();
}
解决登录时静态资源的url占用saveRequest保存的之前访问页面地址,跳转不正确的问题
/**
* 解决静态资源被 SpringSecurity 拦截的问题
* @param web
* @throws Exception
*/
@Override
public void configure(WebSecurity web) throws Exception {
web.ignoring().antMatchers( “/static/**” );
}
/**
* 指定自定义的userService
* @param auth
* @throws Exception
*/
@Override
protected void configure(AuthenticationManagerBuilder auth) throws Exception {
auth.userDetailsService(userDetailsService).passwordEncoder(passwordEncoder());
}
(二)、自定义userService
/**
* 自定义用户服务
* Created by zhaoyanzeng on 2019/2/25.
*/
@Component
public class SsoUserDetailService implements UserDetailsService {
@Autowired
private UserDao userDao;
@Override
public UserDetails loadUserByUsername(String username) throws UsernameNotFoundException {
//此处改为数据库
User user = null;
try {
user = userDao.getUserByUsername(username);
} catch (DBException e) {
throw new UsernameNotFoundException( “用户不存在” );
}
return user;
}
}
持久层的查询
@Repository
public class UserDao {
/**
* 保存 报文
* @throws DBException
*/
public User getUserByUsername(String username) throws DBException {
String sql = “select * from user_ where username=?” ;
Ps ps = new Ps();
ps.add(username);
RMap map = DB.getMap(sql,ps);
//后期完善其他校验信息
return new User(
(String) map.get( “username” ),
(String) map.get( “password” ),
AuthorityUtils.commaSeparatedStringToAuthorityList( “ROLE_USER” ));//暂时不考虑角色问题
}
public List<RMap> findUserList() throws DBException {
String sql = “select * from user_” ;
return DB.getMapList(sql);
}
}
(三)、编写SsoAuthorizationServerConfig 类 继承 AuthorizationServerConfigurerAdapter 添加注解
@Configuration
@EnableAuthorizationServer
重写方法
配置客户端信息
内存存储客户端信息
/**
* 覆盖客户端配置类
* @param clients
* @throws Exception
*/
@Override
public void configure(ClientDetailsServiceConfigurer clients) throws Exception {
clients.inMemory().
withClient( “clinet1” )//客户端ID
.secret( “clinet1” )//客户端密码
.authorizedGrantTypes( “authorization_code” , “refresh_token” )//认证方式 授权码认证模式
.scopes( “all” )
.and()
.withClient( “clinet2” )
.secret( “clinet2” )
.authorizedGrantTypes( “authorization_code” , “refresh_token” )
.scopes( “all” );
}
数据库存储客户端信息
/**
* 配置客户端详情服务(ClientDetailsService)
* 客户端详情信息在这里进行初始化
* 通过数据库来存储调取详情信息
*
* @param clients clients
* @throws Exception
*/
@Override
public void configure(ClientDetailsServiceConfigurer clients) throws Exception {
clients.withClientDetails(clientDetails());
}
@Bean
public ClientDetailsService clientDetails () {
JdbcClientDetailsService service = new JdbcClientDetailsService(dataSource);
return service;
}
千万不要忘了注入dataSource 呀
@Configuration
public class DataSourceConfig {
@Bean(name = “dataSource” )
@Qualifier( “dataSource” )
@ConfigurationProperties(prefix= “spring.datasource” )
public DataSource getMyDataSource (){
return DataSourceBuilder.create().build();
}
@Bean
public SecurityProperties securityProperties (){
return new SecurityProperties();
}
}
配置文件application.properties中配置数据库的信息
spring.datasource.driver-class-name = com.mysql.jdbc.Driver
spring.datasource.url = jdbc:mysql://localhost:3306/sso?autoReconnect= true &autoReconnectForPools= true &useUnicode= true &characterEncoding=utf8
spring.datasource.username = root
spring.datasource.password = 123456
接着说SsoAuthorizationServerConfig 重写的方法
token策略
@Override
public void configure(AuthorizationServerEndpointsConfigurer endpoints) throws Exception {
endpoints.tokenStore(tokenStore())
.accessTokenConverter(jwtAccessTokenConverter());
}
@Bean
public TokenStore tokenStore () {
return new JwtTokenStore(jwtAccessTokenConverter());
}
@Bean
public JwtAccessTokenConverter jwtAccessTokenConverter (){
JwtAccessTokenConverter converter = new JwtAccessTokenConverter();
converter.setSigningKey( “test” );
return converter;
}
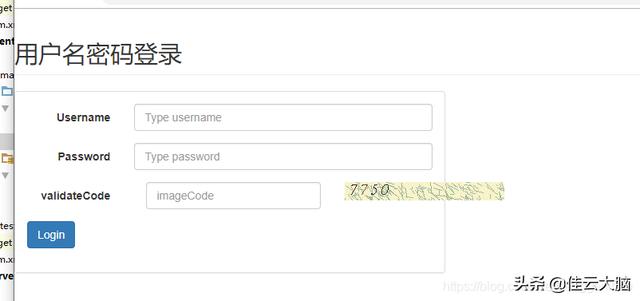
(四)、编写页面
<h2 class= “page-header” >用户名密码登录</h2>
<div class= “row” >
<div class= “col-md-6” >
<div class= “panel panel-default” >
<div class= “panel-body” >
<form action= “authentication/form” method= “post” class= “form-horizontal” >
<div class= “form-group” >
<label for = “username” class= “col-sm-3 control-label” >Username</label>
<div class= “col-sm-9” >
<input type = “text” id= “username” name= “username” value= “” placeholder = “Type username”
class= “form-control” />
</div>
</div>
<div class= “form-group” >
<label for = “password” class= “col-sm-3 control-label” >Password</label>
<div class= “col-sm-9” >
<input type = “password” name= “password” id= “password” value= “” placeholder= “Type password”
class= “form-control” />
</div>
</div>
<div class= “form-group” >
<label for = “password” class= “col-sm-3 control-label” >validateCode</label>
<div class= “col-sm-9” >
<div class= “col-sm-8” >
<input type = “text” name= “imageCode” id= “imageCode” value= “” placeholder= “imageCode”
class= “form-control” />
</div>
<div class= “col-sm-1” >
<img src= “code/image?width=200” onclick= “this.src=’code/image?width=100′” />
</div>
</div>
</div>
<div class= “form-group” >
<div class= “col-sm-9” >
<input type = “submit” value= “Login” class= “btn btn-primary” />
</div>
</div>
</form>
</div>
</div>
</div>
</div>
编写跳转login.html的controller
@Controller
public class LoginController {
@RequestMapping( “/login” )
public String toLogin () {
return “login” ;
}
}
认证服务器配置完成,下面看看client需要怎么写呢
client1
添加依赖 (父子项目可以把依赖放在父工程的pom中,但是实际项目中可能不会在一起,所以每一个都引了一下)
<dependency>
<groupId>org.springframework.boot</groupId>
<artifactId>spring-boot-starter-security</artifactId>
</dependency>
<dependency>
<groupId>org.springframework.boot</groupId>
<artifactId>spring-boot-starter-web</artifactId>
</dependency>
<dependency>
<groupId>org.springframework.security.oauth</groupId>
<artifactId>spring-security-oauth2</artifactId>
</dependency>
<dependency>
<groupId>org.springframework.security</groupId>
<artifactId>spring-security-jwt</artifactId>
</dependency>
首先在启动类上添加注解,使之成为一个spring security sso项目
@SpringBootApplication
@RestController
@EnableOAuth2Sso
public class SsoClient2Application {
public static void main(String[] args) {
SpringApplication.run(SsoClient2Application.class, args);
}
@GetMapping( “/user” )
public Authentication user(Authentication user){
return user;
}
}
添加配置 application.properties
security.oauth2.client.clientId = zhaoyanzeng
security.oauth2.client.clientSecret = ** (自己来定)
security.oauth2.client.user-authorization-uri =
security.oauth2.client.access-token-uri =
security.oauth2.resource.jwt.key-uri =
server.port = 8070
server.context-path = /client1
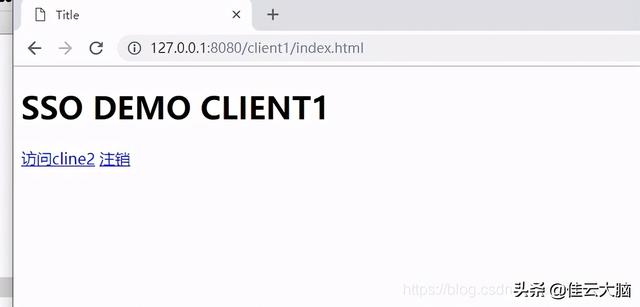
添加测试页面 index.html
<!DOCTYPE html>
<html lang= “en” >
<head>
<meta charset= “UTF-8” >
<title>Title</title>
</head>
<body>
<h1>SSO DEMO CLIENT2</h1>
<a href= “#34; >访问cline2</a>
</body>
</html>
客户端2可是如此
security.oauth2.client.clientId = zhaoyanzeng
security.oauth2.client.clientSecret = **
security.oauth2.client.user-authorization-uri =
security.oauth2.client.access-token-uri =
security.oauth2.resource.jwt.key-uri =
server.port = 8060
server.context-path = /client2
client 也添加测试页面
<!DOCTYPE html>
<html lang= “en” >
<head>
<meta charset= “UTF-8” >
<title>Title</title>
</head>
<body>
<h1>SSO DEMO CLIENT2</h1>
<a href= “#34; >访问cline1</a>
</body>
</html>
(五)、测试
先启动sso-server 再分别启动client1 和client2
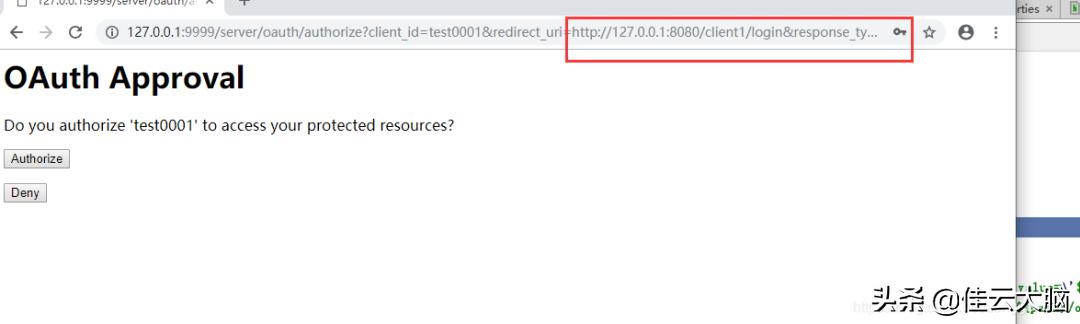
先访问
系统未登录 跳转认证服务器登录页面
登录完成后跳转回client1/index.html
点击访问client2 认证后直接跳转client2/index.html
————————————————
版权声明:本文为CSDN博主「小增哥」的原创文章,遵循CC 4.0 BY-SA版权协议,转载请附上原文出处链接及本声明。
原文链接:


