Visual Studio Code基于各种插件能够编写调试多种类型的开发语言,目前已经尝试C#、Python、Go、PHP,今天试了下C,特将过程记录下来。
1、安装 MinGW
MinGW是一个精简的Windows平台C/C++编译器,下载地址:
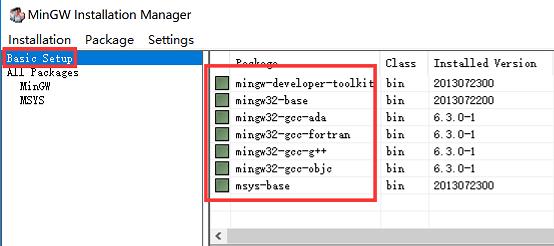
一路安装,把Basic Setup中的都选上:
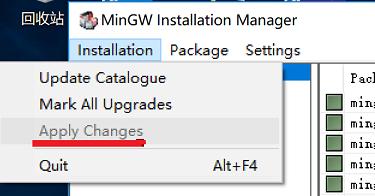
然后点击“Installation”-“Apply Changes”。
2、安装插件
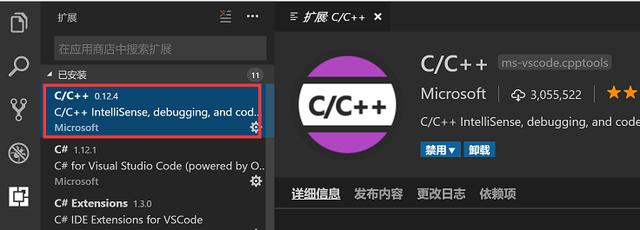
Visual Studio Code中安装插件C/C++。
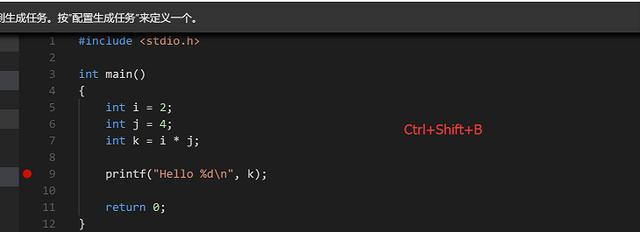
3、编写程序
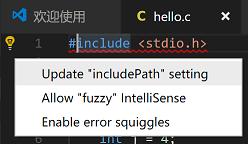
编写一个hello.c,会出现一个错误提示,点击左边的提示灯,在打开的建议菜单中点击“Update “includePath” setting”。
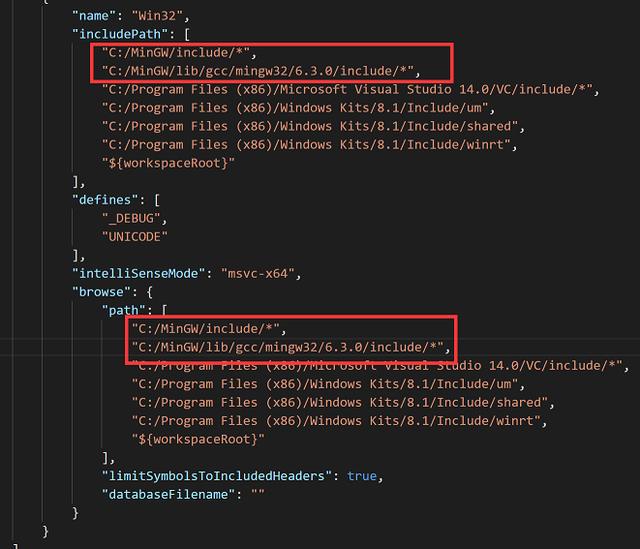
在随后自动创建的文件c_cpp_properties.json中修改includePath和browse path,添加MinGW的include目录。
如果以后有其它标准的 头文件 找不到,就去MinGW下找就行了。
4、编译程序
同时按下“Ctrl+Shift+B”,创建一个Task。
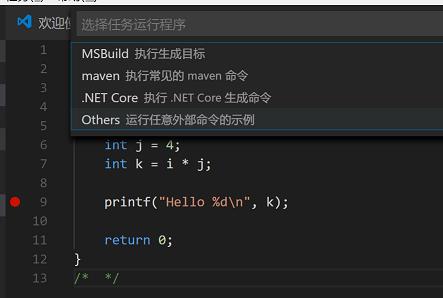
在弹出的提示中点击“配置生成任务”按钮,选择“Others”。
修改自动生成的tasks.json文件:
{
 // See
 // for the documentation about the tasks.json format
 "version": "2.0.0",
 "tasks": [
 {
 "taskName": "build-hello", // 任务名称
 "type": " shell ",
 "command": "gcc",
 "args": [
 "hello.c",
 "-o hello", // 生成hello. exe
 "-g" // 产生调试信息
 ],
 "problemMatcher": [
 "$gcc"
 ],
 "group": {
 "kind": "build",
 "isDefault": true
 }
 }
 ]
}
修改完成之后,再次按下“Ctrl+Shift+B”,就开始编译程序了。
创建生成任务以及运行任务也可以通过菜单栏的“任务”来完成。
5、调试程序
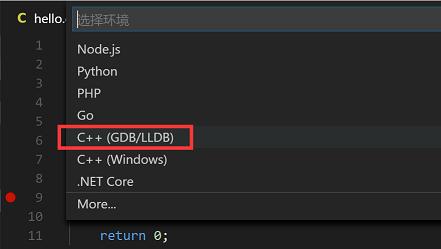
按“F5”,选择运行环境,自动生成launch.json配置文件。

修改生成的launch.json:
{
 "version": "0.2.0",
 "configurations": [
 {
 "name": "(gdb) Launch",
 "type": "cppdbg",
 " request ": "launch",
 "program": "${workspaceRoot}/hello.exe", // task生成的文件
 "args": [],
 "stopAtEntry": false,
 "cwd": "${workspaceRoot}",
 "environment": [],
 "externalConsole": true,
 "MIMode": "gdb",
 "miDebuggerPath": "C:/MinGW/bin/gdb.exe", // 调试主程序
 "setupCommands": [
 {
 "description": "Enable pretty-printing for gdb",
 "text": "-enable-pretty-printing",
 "ignoreFailures": true
 }
 ],
 "preLaunchTask": "build-hello" // 运行前先执行生成任务
 }
 ]
}
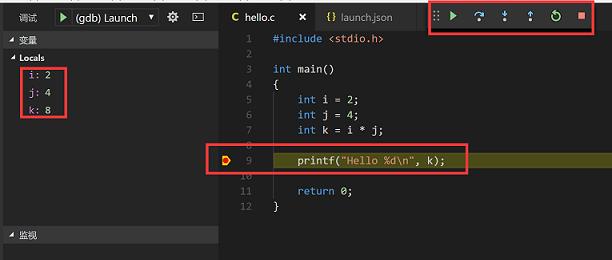
再按“F5”,启动调试,看看程序运行到断点了吗?
这个步骤也可以通过菜单栏的“调试”来完成。
6、源码
最后附上这个测试用例:


