什么是Go?
Go(也称为Golang)是Google开发的一种开源编程语言。 它是一种静态类型的编译语言。 Go支持并发编程,即它允许同时运行多个进程。 这是通过使用通道,goroutines等实现的。Go具有垃圾回收,垃圾回收本身负责内存管理并允许延迟执行功能。
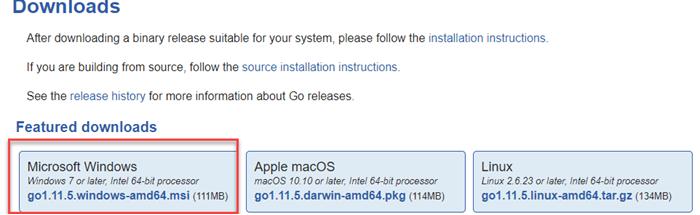
如何下载和安装GO
步骤1)前往。 下载适用于您的操作系统的二进制文件。
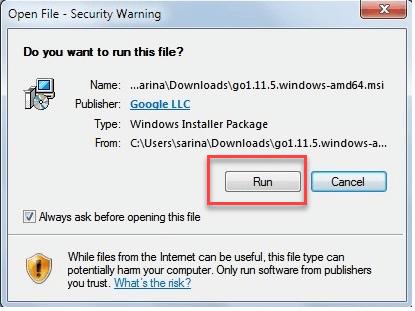
步骤2)双击安装程序,然后单击“运行”。
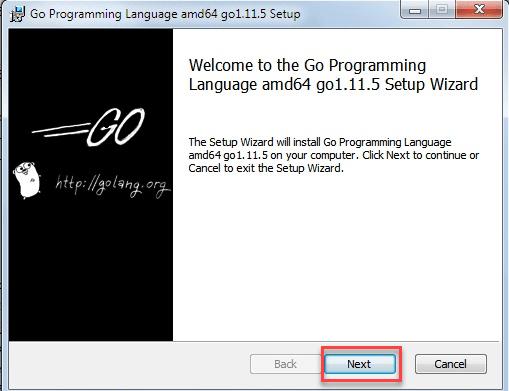
步骤3)点击“下一步”
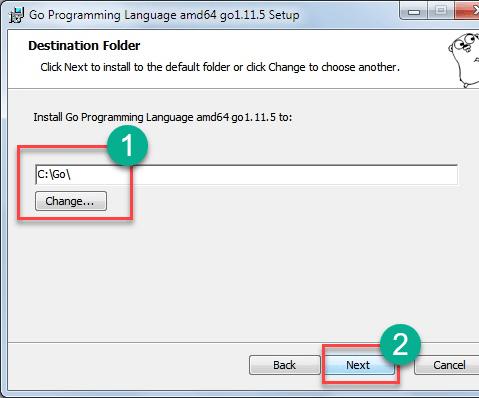
步骤4)选择安装文件夹,然后单击“下一步”。
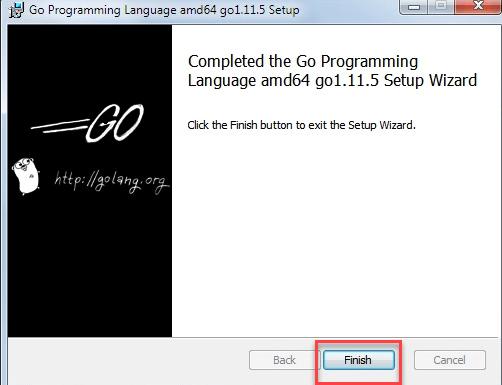
步骤5)安装完成后,单击完成。
步骤6)安装完成后,您可以通过打开终端并输入以下内容来进行验证
go version 这将显示go安装的版本

您的第一个Go程序
创建一个名为studyGo的文件夹。 您将在此文件夹中创建我们的go程序。 Go文件的扩展名为.go。 您可以使用以下语法运行Go程序
go run <filename> 创建一个名为first.go的文件,并将以下代码添加到其中并保存
 package main
import ("fmt")

func main() {
fmt.Println("Hello World! This is my first Go program\n")
}
命令终端进入此文件夹。 使用以下命令运行程序
go run first.go 您可以看到输出打印
Hello World! This is my first Go program 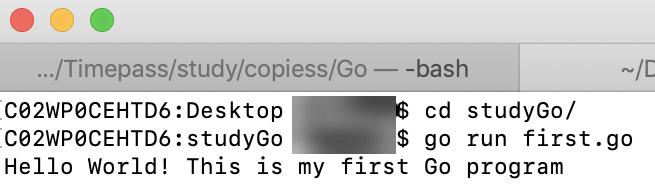
现在让我们讨论上面的程序。
package main -每个go程序都应以包名称开头。 Go允许我们在另一个go程序中使用包,因此支持代码可重用性。 go程序的执行从名为main的 软件包 中的代码开始。
import fmt -导入软件包fmt。 该软件包实现了I / O功能。
func main() -这是开始执行程序的函数。 主要功能应始终放在主包装中。 在main()下,您可以在{}内编写代码。
fmt.Println -这将通过fmt的Println功能在屏幕上打印文本。
注意:在以下各节中,当您提到执行/运行代码时,这意味着将代码保存在扩展名为.go的文件中,并使用以下语法运行它
go run <filename> 数据类型
类型(数据类型)表示存储在变量中的值的类型,函数返回的值的类型等。
Go中有三种基本类型。
数字类型 – 表示数值包括整数,浮点,而复杂的值。 各种数字类型为:
int8-8位有符号整数。
int16-16位有符号整数。
int32-32位有符号整数。
int64-64位有符号整数。
uint8-8位无符号整数。
uint16-16位无符号整数。
uint32-32位无符号整数。
uint64-64位无符号整数。
float32-32位浮点数。
float64-64位浮点数。
complex64 –具有float32实部和虚部。
complex128-具有float32实部和虚部。
字符串 类型 -表示字节序列(字符)。 您可以对字符串进行各种操作,例如字符串连接,提取子字符串等
布尔类型 -表示2个值,即true或false。
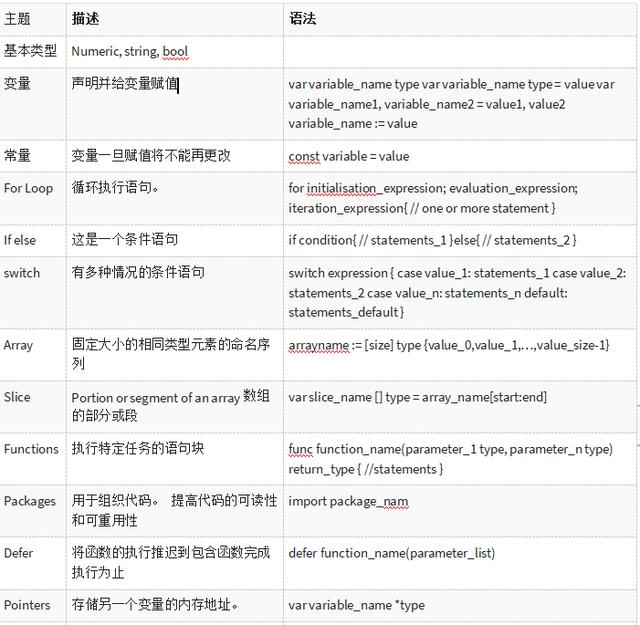
变量
变量指向存储某种值的存储位置。 类型参数(使用以下语法)表示可以存储在内存位置中的值的类型。
可以使用语法声明变量
var <variable_name> <type> 声明类型的变量后,可以将变量分配给该类型的任何值。
您还可以在声明过程中使用以下命令为变量赋予初始值:
var <variable_name> <type> = <value> 如果用初始值声明变量,请从分配的值类型中推断变量的类型。 因此,您可以使用以下语法在声明期间省略类型
var <variable_name> = <value> 另外,您可以使用以下语法声明多个变量
var <variable_name1>, <variable_name2> = <value1>, <value2> 下面的程序有一些变量声明的例子
 package main
import "fmt"

func main() {
    //declaring a integer variable x
    var x int
    x=3 //assigning x the value 3
    fmt.Println("x:", x) //prints 3

    //declaring a integer variable y with value 20 in a single statement and prints it
    var y int=20
    fmt.Println("y:", y)

    //declaring a variable z with value 50 and prints it
    //Here type int is not explicitly mentioned
    var z=50
    fmt.Println("z:", z)

    //Multiple variables are assigned in single line- i with an integer and j with a string
    var i, j = 100,"hello"
    fmt.Println("i and j:", i,j)
}
输出将是
 x: 3
y: 20
z: 50
i and j: 100 hello
Go还提供了一种简单的方法来声明带有值的变量,方法是使用
<variable_name> := <value> 请注意,您使用 :=而不是= 。 并且您不能使用 :=为已声明的了的变量再次赋值。 :=仅用于声明同时分配值。
使用以下代码创建一个名为assign.go的文件
 package main
import ("fmt")

func main() {
a := 20
fmt.Println(a)

//gives error since a is already declared
a := 30
fmt.Println(a)
}
执行go run assign.go 以查看结果为
./assign.go:7:4: no new variables on left side of := 声明为没有初始值的变量对于数字类型将为0,对于布尔类型将为false,对于字符串将为空字符串
常量
常量变量是指赋值后不能更改其值的变量。 使用关键字“ const”声明Go中的常量
使用以下代码创建一个名为constant.go的文件
 package main
import ("fmt")

func main() {
const b =10
fmt.Println(b)
b = 30
fmt.Println(b)
}
执行go run constant.go以查看结果
.constant.go:7:4: cannot assign to b Loops
循环用于根据条件重复执行语句块。 大多数编程语言都提供3种类型的循环-for, while, do while。 但是 Go仅支持for循环 。
for循环的语法是
 for initialisation_expression; evaluation_expression; iteration_expression{
   // one or more statement
}
Initialization_expression首先执行(并且仅执行一次)。
然后evaluation_expression进行评估,如果为真则执行块中的代码。
然后iteration_expression 被执行,并且evaluation_expression再次评估。 如果为true,则再次执行语句块。 一直如此继续下去,直到evaluation_expression为假。
将以下程序复制到文件中并执行,以查看for循环打印数字(从1到5)
 package main
import "fmt"

func main() {
var i int
for i = 1; i <= 5; i++ {
fmt.Println(i)
    }
}
Output is
 1
2
3
4
5
If else
If else是条件语句.
语法是
 if condition{
// statements_1
}else{
// statements_2
}
在这里,条件被评估,如果为true,则将执行statement_1,否则将执行statement_2。
您也可以使用if语句,不需要else。 您还可以串联if语句来使用。
执行以下程序。 它检查数字x是否小于10。如果是,它将打印“ x is less than 10”。
 package main
import "fmt"

func main() {
    var x = 50
    if x < 10 {
        //Executes if x < 10
        fmt.Println("x is less than 10")
    }
}
由于x的值大于10,因此if块条件内的语句将不会执行。
现在看下面的程序。 我们有一个else块,它将在if评估失败时执行。
 package main
import "fmt"

func main() {
    var x = 50
    if x < 10 {
        //Executes if x is less than 10
        fmt.Println("x is less than 10")
    } else {
        //Executes if x >= 10
        fmt.Println("x is greater than or equals 10")
    }
}
该程序将为您提供输出
x is greater than or equals 10 现在我们看一个包含多个if else块的程序(串联if else),执行以下示例。 它检查数字是小于10还是在10-90之间或大于90。
 package main
import "fmt"

func main() {
    var x = 100
    if x < 10 {
        //Executes if x is less than 10
        fmt.Println("x is less than 10")
    } else if x >= 10 && x <= 90 {
        //Executes if x >= 10 and x<=90
        fmt.Println("x is between 10 and 90")
    } else {
        //Executes if both above cases fail i.e x>90
        fmt.Println("x is greater than 90")
    }
}
在这里,首先,if条件检查x是否小于10,是否小于10。 因此它检查下一个条件(否则)是否在10到90之间,这也是错误的。 因此,它然后在else节下执行块,该块给出输出
x is greater than 90 Switch
switch是另一个条件语句。 switch语句对表达式进行求值,并将结果与一组可用值(案例)进行比较。 找到匹配项后,将执行与该match(case)相关联的语句。 如果找不到匹配项,则将不会执行任何操作。 您还可以添加默认大小写进行切换,如果找不到其他匹配项,将执行该默认大小写。 switch的语法是
 switch expression {
    case value_1:
        statements_1
    case value_2:
        statements_2
    case value_n:
        statements_n
    default:
        statements_default
    }
在此,将表达式的值与每种情况下的值进行比较。 一旦找到匹配项,则执行与该案例关联的语句。 如果找不到匹配项,则执行默认部分下的语句。
执行以下程序
 package main
import "fmt"

func main() {
    a,b := 2,1
    switch a+b {
    case 1:
        fmt.Println(" sum  is 1")
    case 2:
        fmt.Println("Sum is 2")
    case 3:
        fmt.Println("Sum is 3")
    default:
        fmt.Println("Printing default")
    }
}
输出
Sum is 3 将a和b的值更改为3,结果将是
Printing default 您也可以使用逗号分隔多个值。
Arrays
数组表示固定大小,具有相同类型的元素的命名序列。 您不能有一个同时包含整数和字符的数组。 定义大小后就无法更改数组的大小。
声明数组的语法是
var arrayname [size] type 可以使用以下语法为每个数组元素分配值:
arrayname [index] = value 数组索引从 0 to size-1 .
您可以使用以下语法在声明期间为数组元素分配值
arrayname := [size] type {value_0,value_1,…,value_size-1} 您也可以忽略size参数,同时通过将size替换为…来用值声明数组,编译器将从值的数量中找到长度。 语法是
arrayname := […] type {value_0,value_1,…,value_size-1} 您可以使用以下语法找到数组的长度
len(arrayname) 执行以下示例以了解数组
 package main
import "fmt"

func main() {
    var numbers [3] string //Declaring a string array of size 3 and adding elements
    numbers[0] = "One"
    numbers[1] = "Two"
    numbers[2] = "Three"
    fmt.Println(numbers[1]) //prints Two
    fmt.Println(len(numbers)) //prints 3
    fmt.Println(numbers) // prints [One Two Three]

    directions := [...] int {1,2,3,4,5} // creating an integer array and the size of the array is defined by the number of elements
    fmt.Println(directions) //prints [1 2 3 4 5]
    fmt.Println(len(directions)) //prints 5

    //Executing the below commented statement prints invalid array index 5 (out of bounds for 5-element array)
    //fmt.Println(directions[5])
}
Output
 Two
3
[One Two Three]
[1 2 3 4 5]
5
Slice
切片(Slice)是数组的一个部分或段。 或者是它指向的基础数组的视图或局部视图。 您可以使用切片名称和索引号来访问切片的元素,就像在数组中一样。 您不能更改数组的长度,但是可以更改切片的大小。
切片的内容实际上是指向数组元素的指针。 它的意思是“ 如果更改切片中的任何元素,则基础数组的内容也将受到影响。 ”
创建切片的语法是
var slice_name [] type = array_name[start:end] 这将从名为array_name的数组创建一个名为slice_name的切片,其元素的索引从end-1开始。
执行以下程序。 该程序将根据数组创建切片并进行打印。 此外,您可以看到修改切片中的内容将修改实际的数组。
 package main
import "fmt"

func main() {
    // declaring array
    a := [5] string {"one", "two", "three", "four", "five"}
    fmt.Println("Array after creation:",a)

    var b [] string = a[1:4] //created a slice named b
    fmt.Println("Slice after creation:",b)

    b[0]="changed" // changed the slice data
    fmt.Println("Slice after modifying:",b)
    fmt.Println("Array after slice modification:",a)
}
结果打印输出为
 Array after creation: [one two three four five]
Slice after creation: [two three four]
Slice after modifying: [changed three four]
Array after slice modification: [one changed three four five]
您可以将某些功能应用于切片
len(slice_name )-返回切片的长度
append(slice_name,value_1,value_2) -用于将value_1和value_2附加到现有切片。
append(slice_nale1,slice_name2…) –将slice_name2附加到slice_name1
执行以下程序。
 package main
import "fmt"

func main() {
a := [5] string {"1","2","3","4","5"}
slice_a := a[1:3]
b := [5] string {"one","two","three","four","five"}
slice_b := b[1:3]

    fmt.Println("Slice_a:", slice_a)
    fmt.Println("Slice_b:", slice_b)
    fmt.Println("Length of slice_a:", len(slice_a))
    fmt.Println("Length of slice_b:", len(slice_b))

    slice_a = append(slice_a,slice_b...) // appending slice
    fmt.Println("New Slice_a after appending slice_b :", slice_a)

    slice_a = append(slice_a,"text1") // appending value
    fmt.Println("New Slice_a after appending text1 :", slice_a)
}
输出
 Slice_a: [2 3]
Slice_b: [two three]
Length of slice_a: 2
Length of slice_b: 2
New Slice_a after appending slice_b : [2 3 two three]
New Slice_a after appending text1 : [2 3 two three text1]
该程序首先创建2个切片并打印其长度。 然后将一个切片附加到另一个切片,然后将字符串附加到所得切片。
Functions
函数代表执行特定任务的语句块。 函数声明告诉我们函数名称,返回类型和输入参数。 函数定义表示函数中包含的代码。 声明函数的语法是
 func function_name(parameter_1 type, parameter_n type) return_type {
//statements
}
参数和返回类型是可选的。 另外,您可以从一个函数返回多个值。
让我们运行以下示例。 在这里,名为calc的函数将接受2个数字并执行加法和减法并返回两个值。
 package main
import "fmt"

//calc is the function name which accepts two integers num1 and num2
//(int, int) says that the function returns two values, both of integer type.
func calc(num1 int, num2 int)(int, int) {
    sum := num1 + num2
    diff := num1 - num2
    return sum, diff
}

func main() {
    x,y := 15,10

    //calls the function calc with x and y an d gets sum, diff as output
    sum, diff := calc(x,y)
    fmt.Println("Sum",sum)
    fmt.Println("Diff",diff)
}
输出是
 Sum 25
Diff 5
Packages
包用于组织代码。 在大型项目中,在单个文件中编写代码是不可能的事情。 所以我们根据不同的软件包来组织代码。 这提高了代码的可读性和可重用性。 可执行的Go程序应包含一个名为main的程序包,该程序的执行从名为main的函数开始。 您可以使用以下语法将其他程序包导入我们的程序中
import package_name 在以下示例中,我们将看到并讨论如何创建和使用包。
步骤1)创建一个名为package_example.go的文件,并添加以下代码
 package main
import "fmt"
//the package to be created
import "calculation"

func main() {
x,y := 15,10
//the package will have function Do_add()
sum := calculation.Do_add(x,y)
fmt.Println("Sum",sum)
}
在上面的程序中,fmt是Go主要为I / O目的提供给我们的软件包。 此外,您还可以看到一个名为calculation的包。 在main()内部,您可以看到 sum:=calculation.Do_add(x,y)。 这意味着您正在从包calculation中调用函数Do_add。
步骤2)首先,您应该在go的src文件夹下的同名文件夹内创建包calculation。 go的安装路径可以从PATH变量中找到。
对于Mac,通过执行echo $ PATH查找路径

所以路径是/ usr / local / go
对于Windows,通过执行echo%GOROOT%找到路径

这里的路径是C:\ Go\
步骤3)导航到src文件夹(对于Mac,为/ usr / local / go / src;对于Windows,为C:\ Go \ src)。 现在从代码中,程序包名称为calculation。 Go要求将软件包放在src目录下的同名目录中。 在src文件夹中创建一个名为calculation的目录。
第4步)在calculation目录中创建一个名为calc.go的文件(您可以输入任何名称,但程序包名称很重要。此处应为calculation),并添加以下代码
package calculation
func Do_add(num1 int, num2 int)(int) {
sum := num1 + num2
return sum
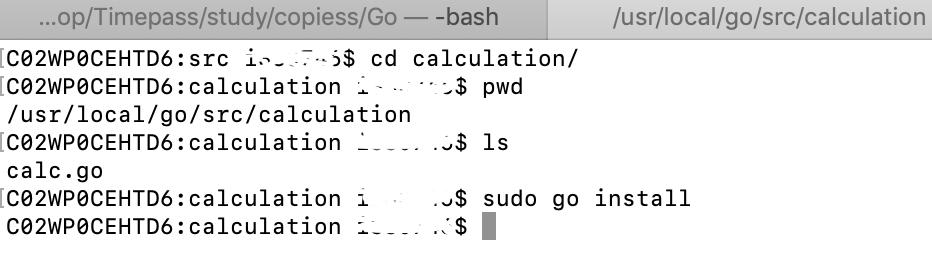
} 步骤5)从calculation目录运行命令go install,它将编译calc.go。
步骤6)现在返回package_example.go并运行go run package_example.go。 输出将为Sum 25。
请注意,函数Do_add的名称以大写字母开头。 这是因为在Go中,如果函数名称以大写字母开头,则意味着其他程序可以看到(访问),否则其他程序无法访问它。 如果函数名称是do_add,那么您将得到错误
无法引用未导出的名称calculation.calc。
延迟和堆叠延迟(Defer and stacking defers)
Defer语句用于延迟执行函数的调用,直到包含defer语句的函数完成执行为止。
让我们通过一个例子来学习:
 package main
import "fmt"

func sample() {
    fmt.Println("Inside the sample()")
}
func main() {
    //sample() will be invoked only after executing the statements of main()
    defer sample()
    fmt.Println("Inside the main()")
}
输出
 Inside the main()
Inside the sample()
在这里,sample()的执行被推迟到封闭函数(main())的执行完成为止。
堆叠延迟使用多个延迟语句。 假设一个函数中有多个defer语句。 Go将所有延迟的函数调用放置在堆栈中,一旦封闭函数返回,将按 后进先出(LIFO)顺序 执行堆栈的函数。 您可以在下面的示例中看到它。
执行以下代码
 package main
import "fmt"

func display(a int) {
    fmt.Println(a)
}
func main() {
    defer display(1)
    defer display(2)
    defer  display (3)
    fmt.Println(4)
}
输出
 4
3
2
1
这里main()内部的代码首先执行,然后以相反的顺序(即4、3、2、1)执行延迟的函数调用。
指针Pointers
在解释指针之前,让我们首先讨论“&”运算符。 “&”运算符用于获取变量的地址。 这意味着“&a”将获得变量a的内存地址。
执行以下程序以显示变量的值和该变量的地址
 package main
import "fmt"

func main() {
a := 20
fmt.Println("Address:",&a)
fmt.Println("Value:",a)
}
结果是
 Address: 0xc000078008
Value: 20
指针变量存储另一个变量的内存地址。 您可以使用语法定义指针
var variable_name *type 星号(*)表示变量是一个指针。 通过执行以下程序,您将了解更多
 package main
import "fmt"

func main() {
//Create an integer variable a with value 20
a := 20

//Create a pointer variable b and assigned the address of a
var b *int = &a

//print address of a(&a) and value of a
fmt.Println("Address of a:",&a)
fmt.Println("Value of a:",a)

//print b which contains the memory address of a i.e. &a
fmt.Println("Address of pointer b:",b)

//*b prints the value in memory address which b contains i.e. the value of a
fmt.Println("Value of pointer b",*b)

//increment the value of variable a using the variable b
*b = *b+1

//prints the new value using a and *b
fmt.Println("Value of pointer b",*b)
fmt.Println("Value of a:",a)}
输出是
Address of a: 0x416020
Value of a: 20
Address of pointer b: 0x416020
Value of pointer b 20
Value of pointer b 21
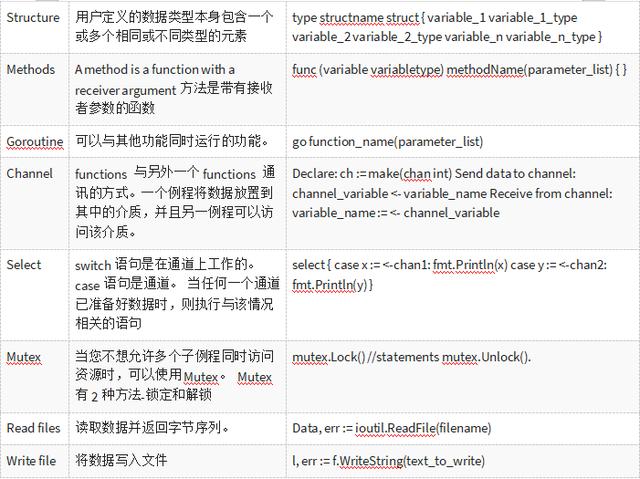
Value of a: 21 结构Structures
结构是用户定义的数据类型,其本身包含一个或多个相同或不同类型的元素。
使用结构是一个两步过程。
- 首先,创建(声明)结构类型
- 其次,创建该类型的变量以存储值。
当您要将相关数据存储在一起时,主要使用结构。
考虑一条具有姓名,年龄和地址的员工信息。 您可以通过两种方式处理
创建3个数组-一个数组存储雇员的姓名,一个数组存储年龄,第三个存储年龄。
声明一个具有3个字段的结构类型-名称,地址和年龄。 创建该结构类型的数组,其中每个元素都是具有名称,地址和年龄的结构对象。
第一种方法效率不高。 在这种情况下,结构更方便。
声明结构的语法是
 type structname struct {
   variable_1 variable_1_type
   variable_2 variable_2_type
   variable_n variable_n_type
}
结构声明的一个示例是
 type emp struct {
    name string
    address string
    age int
}
在这里,将创建一个名为emp的新的用户定义类型。 现在,您可以使用以下语法创建emp类型的变量
var variable_name struct_name 比如
var empdata1 emp 您可以将empdata1的值设置为
   empdata1.name = "John"
empdata1.address = "Street-1, Bangalore"
empdata1.age = 30
您还可以创建一个结构变量并通过以下方式分配值
empdata2 := emp{"Raj", "Building-1, Delhi", 25} 在这里,您需要维护元素的顺序。 Raj将映射到名称,下一个元素映射到地址,最后一个映射到年龄。
执行以下代码
 package main
import "fmt"

//declared the structure named emp
type emp struct {
        name string
        address string
        age int
}

//function whi ch  accepts variable of emp type and prints name property
func display(e emp) {
          fmt.Println(e.name)
}

func main() {
// declares a variable, empdata1, of the type emp
var empdata1 emp
//assign values to members of empdata1
empdata1.name = "John"
empdata1.address = "Street-1, London"
empdata1.age = 30

//declares and assign values to variable empdata2 of type emp
empdata2 := emp{"Raj", "Building-1, Paris", 25}

//prints the member name of empdata1 and empdata2 using display function
display(empdata1)
display(empdata2)
}
Output
 John
Raj
方法(而不是函数)Methods(not functions)
方法是带有接收方参数的函数。 在结构上,它介于func关键字和方法名称之间。 方法的语法是
 func (variable variabletype) methodName(parameter1 paramether1type) {
}
让我们将上面的示例程序转换为使用方法而不是函数。
 package main
import "fmt"

//declared the structure named emp
type emp struct {
    name string
    address string
    age int
}

//Declaring a function with receiver of the type emp
func(e emp) display() {
    fmt.Println(e.name)
}

func main() {
    //declaring a variable of type emp
    var empdata1 emp

    //Assign values to members
    empdata1.name = "John"
    empdata1.address = "Street-1, Lodon"
    empdata1.age = 30

    //declaring a variable of type emp and assign values to members
    empdata2 := emp {
        "Raj", "Building-1, Paris", 25}

    //Invoking the method using the receiver of the type emp
   // syntax is variable.methodname()
    empdata1.display()
    empdata2.display()
}
Go不是面向对象的语言,并且没有类的概念。 方法使您感觉像在面向对象程序中所做的那样,其中使用语法objectname.functionname()调用类的功能。
并发Concurrency
Go支持并发执行任务。 这意味着Go可以同时(simultaneously)执行多个任务。 它与并行性(parallelism)的概念不同。 在并行性(parallelism)中,一个任务被分解为多个小子任务(subtasks ),并且并行(parallel)执行。 但并发(concurrency),多个任务正在同时(simultaneously)执行。 在Go中,并发(concurrency)是通过Goroutine和Channel中实现的。
Goroutines
goroutine是可以与其他函数同时(simultaneously)运行的函数。 通常,当调用一个函数时,控制权将转移到被调用的函数中,一旦完成执行,控制权便返回到调用函数。 然后,调用函数继续执行。 调用函数等待被调用的函数完成执行,然后再执行其余的语句。
但是,对于goroutine,调用函数将不等待被调用函数的执行完成。 它将继续执行下一条语句。 一个程序中可以有多个goroutine。
同样,一旦完成执行语句,主程序将退出,并且不会等待调用的goroutine完成。
Goroutine使用关键字go和函数调用来调用。
Example
go add(x,y) 您将通过以下示例了解goroutine。 执行以下程序
 package main
import "fmt"

func display() {
for i:=0; i<5; i++ {
fmt.Println("In display")
}
}

func main() {
//invoking the goroutine display()
go display()
//The main() continues without waiting for display()
for i:=0; i<5; i++ {
fmt.Println("In main")
}
}
output
 In main
In main
In main
In main
In main
这种情况下,主程序也已完成执行,goroutine仍未运行启动。
display()是一个goroutine,它使用以下语法调用
go function_name(parameter list) 在上面的代码中,main()不等待display()完成,并且main()在display()执行其代码之前完成了其执行。 因此,display()中的print语句不会运行其中的打印(Println)。
现在,我们修改程序以从display()打印语句。 我们在main()的for循环中添加了2秒的时间延迟,在display()的for循环中添加了1秒的时间延迟。
 package main
import "fmt"
import "time"

func display() {
for i:=0; i<5; i++ {
time.Sleep(1 * time.Second)
fmt.Println("In display")
}
}

func main() {
//invoking the goroutine display()
go display()
for i:=0; i<5; i++ {
time.Sleep(2 * time.Second)
fmt.Println("In main")
}
}
输出
 In display
In main
In display
In display
In main
In display
In display
In main
In main
In main
现在,您可以看到由于并发执行,两个循环都以重叠的方式执行。
Channels
通道是函数相互通信的一种方式。 可以将它视为一个例程(routine )放置数据并被另一个例程(routine )访问的媒介。
channel 的定义语法
channel_variable := make(chan datatype) Example:
ch := make(chan int) 您可以使用以下语法将数据发送到通道
channel_variable <- variable_name Example
ch <- x 您可以使用以下语法从通道接收数据
variable_name := <- channel_variable Example
y := <- ch 在上面的goroutine示例中,您已经看到主程序不等待goroutine。 但是,涉及通道的情况并非如此。 假设如果goroutine将数据推送到channel,则main()将等待接收通道数据的语句,直到获取数据为止。
您将在下面的示例中看到这一点。 首先,编写一个普通的goroutine并查看其行为。 然后修改程序以使用通道并查看行为。
执行以下程序
 package main
import "fmt"
import "time"

func display() {
time.Sleep(5 * time.Second)
fmt.Println("Inside display()")
}

func main() {
go display()
fmt.Println("Inside main()")
}
output
Inside main() main()完成了执行,并在goroutine执行之前退出。 因此display()内部的打印未执行。
现在,修改上述程序以使用channel 并查看结果。
 package main
import "fmt"
import "time"

func display(ch chan int) {
time.Sleep(5 * time.Second)
fmt.Println("Inside display()")
ch <- 1234
}

func main() {
ch := make(chan int)
go display(ch)
x := <-ch
fmt.Println("Inside main()")
fmt.Println("Printing x in main() after taking from channel:",x)
}
output
 Inside display()
Inside main()
Printing x in main() after taking from channel: 1234
这里发生的是
main()到达x:= <-ch时,将等待通道ch上的数据。 display()等待5秒钟,然后将数据推送到通道ch。 从通道接收到数据时,main()才会被解除阻塞并继续执行。
将数据推送到通道的发送方可以通过关闭通道来告诉接收者不会有更多数据添加到通道。
这主要用于循环将数据推送到通道时使用,可以使用以下语法来关闭通道
close(channel_name) 并且在接收方,在获取数据时,可以通过增加额外的变量来获知,通道是否已经关闭,
variable_name, status := <- channel_variable 如果状态为True,则表示您已从通道接收数据。 如果为false,则表示您正在尝试从关闭的通道进行读取。
您还可以使用通道在goroutine之间进行通信。 需要使用2个goroutine一个将数据推送到通道,另一个将数据从通道接收。 见下面的程序
 package main
import "fmt"
import "time"

//This subroutine pushes numbers 0 to 9 to the channel and closes the channel
func add_to_channel(ch chan int) {
fmt.Println("Send data")
for i:=0; i<10; i++ {
ch <- i //pushing data to channel
}
close(ch) //closing the channel

}

//This subroutine fetches data from the channel and prints it.
func fetch_from_channel(ch chan int) {
fmt.Println("Read data")
for {
    //fetch data from channel
         x, flag := <- ch

     //flag is true if data is received from the channel
         //flag is false when the channel is closed
         if flag == true {
          fmt.Println(x)
      }else{
          fmt.Println("Empty channel")
          break
      }
  }
}

func main() {
//creating a channel variable to transport integer values
ch := make(chan int)

//invoking the subroutines to add and fetch from the channel
//These routines execute simultaneously
go add_to_channel(ch)
go fetch_from_channel(ch)

//delay is to prevent the exiting of main() before goroutines finish
time.Sleep(5 * time.Second)
fmt.Println("Inside main()")
}
这里有2个子例程,一个将数据推送到通道,另一个从通道获取数据,并将数据打印出来。 函数add_to_channel将0到9之间的数字加入通道,最后关闭通道。 同时,函数fetch_from_channel在
x,flag:= <-ch 处等待,一旦数据可用,它将打印数据。 一旦标志为假,它将退出,这表示通道已关闭。
在main()中进行等待是为了防止在goroutine完成执行之前退出main()。
执行代码,并看到输出为
 Read data
Send data
0
1
2
3
4
5
6
7
8
9
Empty channel
Inside main()
Select
Select可以看作是对通道进行操作的switch语句。 这里的case语句将是一个通道操作。 通常,将尝试从通道读取每个case语句的,当任何一种case准备就绪(通道可读)时,将执行与该情况相关的语句。 如果准备好多个case,它将选择一个随机case。 您可以有一个默认case,如果没有任何case准备好,将执行该默认case。
让我们看下面的代码
 package main
import "fmt"
import "time"

//push data to channel with a 4 second delay
func data1(ch chan string) {
    time.Sleep(4 * time.Second)
    ch <- "from data1()"
}

//push data to channel with a 2 second delay
func data2(ch chan string) {
    time.Sleep(2 * time.Second)
    ch <- "from data2()"
}

func main() {
    //creating channel variables for transporting string values
    chan1 := make(chan string)
    chan2 := make(chan string)

    //invoking the subroutines with channel variables
    go data1(chan1)
    go data2(chan2)

    //Both case statements wait for data in the chan1 or chan2.
    //chan2 gets data first since the delay is only 2 sec in data2().
    //So the second case will execute and exits the select block
    select {
    case x := <-chan1:
        fmt.Println(x)
    case y := <-chan2:
        fmt.Println(y)
    }
}
执行上面的程序将给出输出:
from data2() 在这里,select语句等待任何通道中的数据可用。 休眠2秒后,data2()将数据添加到通道,这将导致执行第二种情况。
在这个程序中的select添加一个缺省的case并观察输出的情况。 到达select块时,如果通道上没有任何数据准备就绪,它将执行默认块,而无需等待任何通道上的数据可用。
 package main
import "fmt"
import "time"

//push data to channel with a 4 second delay
func data1(ch chan string) {
    time.Sleep(4 * time.Second)
    ch <- "from data1()"
}

//push data to channel with a 2 second delay
func data2(ch chan string) {
    time.Sleep(2 * time.Second)
    ch <- "from data2()"
}

func main() {
    //creating channel variables for transporting string values
    chan1 := make(chan string)
    chan2 := make(chan string)

    //invoking the subroutines with channel variables
    go data1(chan1)
    go data2(chan2)

    //Both case statements check for data in chan1 or chan2.
    //But data is not available (both routines have a delay of 2 and 4 sec)
    //So the default block will be executed without waiting for data in channels.
    select {
    case x := <-chan1:
        fmt.Println(x)
    case y := <-chan2:
        fmt.Println(y)
    default:
    fmt.Println("Default case executed")
    }
}
该程序将给出输出:
Default case executed 这是因为到达select块时,没有通道具有要读取的数据。 因此,将执行默认case。
Mutex
Mutex是互斥的简称。 当您不想允许多个子例程同时访问资源时,可以使用Mutex。 Mutex有2种方法-锁定和解锁。 Mutex包含在同步包中。 因此,您必须导入同步包。 可以互斥地执行的语句可以放在mutex.Lock()和mutex.Unlock()中。
让我们通过一个示例来计算互斥量,该示例计算循环执行的次数。 在此程序中,我们希望例程运行10次循环,并将计数存储在总和中。 您调用此例程3次,因此总计数应为30。该计数存储在全局变量计数中。
首先,无Mutex运行程序
 package main
import "fmt"
import "time"
import "strconv"
import "math/rand"
//declare count variable, which is accessed by all the routine instances
var count = 0

//copies count to temp, do some processing(increment) and store back to count
//random delay is added between reading and writing of count variable
func process(n int) {
//loop incrementing the count by 10
for i := 0; i < 10; i++ {
time.Sleep(time.Duration(rand.Int31n(2)) * time.Second)
temp := count
temp++
time.Sleep(time.Duration(rand.Int31n(2)) * time.Second)
count = temp
}
fmt.Println("Count after i="+strconv.Itoa(n)+" Count:", strconv.Itoa(count))
}

func main() {
//loop calling the process() 3 times
for i := 1; i < 4; i++ {
go process(i)
}

//delay to wait for the routines to complete
time.Sleep(25 * time.Second)
fmt.Println("Final Count:", count)
}
结果是
  Count after i=1 Count: 11
Count after i=3 Count: 12
Count after i=2 Count: 13
Final Count: 13
执行时结果可能会有所不同,但最终结果不会是30。
这里发生的是3个goroutine试图增加存储在变量count中的循环计数。 假设现在count为5,而goroutine1会将count增加到6。主要步骤包括
Copy count to temp
Increment temp
Store temp back to count
假设在goroutine1执行step3之后不久; 另一个goroutine可能具有旧值,例如3执行上述步骤并将4存储回去,这是错误的。 可以通过使用互斥锁来防止这种情况,因为互斥锁会导致其他例程在一个例程已经在使用变量时等待。
现在,您使用互斥锁运行该程序。 上面提到的3个步骤在互斥体中执行。
 package main
import "fmt"
import "time"
import "sync"
import "strconv"
import "math/rand"

//declare a mutex instance
var mu sync.Mutex

//declare count variable, which is accessed by all the routine instances
var count = 0

//copies count to temp, do some processing(increment) and store back to count
//random delay is added between reading and writing of count variable
func process(n int) {
//loop incrementing the count by 10
for i := 0; i < 10; i++ {
time.Sleep(time.Duration(rand.Int31n(2)) * time.Second)
//lock starts here
mu.Lock()
temp := count
temp++
time.Sleep(time.Duration(rand.Int31n(2)) * time.Second)
count = temp
//lock ends here
mu.Unlock()
}
fmt.Println("Count after i="+strconv.Itoa(n)+" Count:", strconv.Itoa(count))
}

func main() {
//loop calling the process() 3 times
for i := 1; i < 4; i++ {
go process(i)
}

//delay to wait for the routines to complete
time.Sleep(25 * time.Second)
fmt.Println("Final Count:", count)
}
现在输出将是
  Count after i=3 Count: 21
Count after i=2 Count: 28
Count after i=1 Count: 30
Final Count: 30
在这里,我们得到预期结果作为最终输出。 因为语句的读取,递增和写回计数是在互斥锁中执行的。
Error handling错误处理
错误是一些异常情况时,例如关闭未打开的文件,打开不存在的文件等。函数通常将错误作为最后的返回值返回。
以下示例详细说明了该错误。
 package main
import "fmt"
import "os"

//function accepts a filename and tries to open it.
func fileopen(name string) {
    f, er := os.Open(name)

    //er will be nil if the file exists else it returns an error object
    if er != nil {
        fmt.Println(er)
        return
    }else{
    fmt.Println("file opened", f.Name())
    }
}

func main() {
    fileopen("invalid.txt")
}
The output will be:
open /invalid.txt: no such file or directory 这里,我们尝试打开一个不存在的文件,并将错误返回给er变量。 如果文件有效,则错误将为null
Custom errors
使用此功能,可以创建自定义错误。 这是通过使用错误包的New()完成的。 我们重写上面的程序以利用自定义错误。
运行以下程序
 package main
import "fmt"
import "os"
import "errors"

//function accepts a filename and tries to open it.
func fileopen(name string) (string, error) {
    f, er := os.Open(name)

    //er will be nil if the file exists else it returns an error object
    if er != nil {
        //created a new error object and returns it
        return "", errors.New("Custom error message: File name is wrong")
    }else{
    return f.Name(),nil
    }
}

func main() {
    //receives custom error or nil after trying to open the file
    filename, error := fileopen("invalid.txt")
    if error != nil {
        fmt.Println(error)
    }else{
    fmt.Println("file opened", filename)
    }
}
The output will be:
Custom error message:File name is wrong Reading files读取文件
文件用于存储数据。 Go允许我们从文件中读取数据
首先在当前目录中创建一个文件data.txt,其中包含以下内容。
 Line one
Line two
Line three
现在运行以下程序,以查看其将整个文件的内容打印为输出
 package main
import "fmt"
import "io/ioutil"

func main() {
    data, err := ioutil.ReadFile("data.txt")
    if err != nil {
        fmt.Println("File reading error", err)
        return
    }
    fmt.Println("Contents of file:", string(data))
}
此处的 data, err:= ioutil.ReadFile(“ data.txt”)读取数据并返回字节序列。 打印时将其转换为字符串格式。
Writing files写文件
通过一个程序来理解
 package main
import "fmt"
import "os"

func main() {
    f, err := os.Create("file1.txt")
    if err != nil {
        fmt.Println(err)
        return
    }
    l, err := f.WriteString("Write Line one")
    if err != nil {
        fmt.Println(err)
        f.Close()
        return
    }
    fmt.Println(l, "bytes written")
    err = f.Close()
    if err != nil {
        fmt.Println(err)
        return
    }
}
这里创建了一个文件test.txt。 如果文件已经存在,则文件的内容将被截断。 Writeline()用于将内容写入文件。 之后,您使用Close()关闭了文件。
总结
在本Go教程中,我们介绍了